Ten things to know before constructing your Easy Brew website!
1. Easy Brew is made up of building blocks (we call them content blocks) that can be inserted, duplicated and arranged into any page of your website, allowing you to mix and match however you require. You can view all of the available content blocks on the Sample Blocks page. These include useful elements such as Google Maps, YouTube videos and Image Galleries. 

2. To log-in to the CMS of your Easy Brew site, add “/umbraco” to your URL. For example, if your Easy Brew site domain was www.thebestwebsiteever.com.au, to access the CMS you would go to www.thebestwebsiteever.com.au/umbraco. Of course you’ll also need to know the username and password though!

3. There are two parts to the CMS: Content and Media
a) Content section is where you control the website, including adding and arranging content blocks, adding and arranging pages, and update the site’s theme.
b) Media section is where you add and arrange the site’s image assets and uploads.
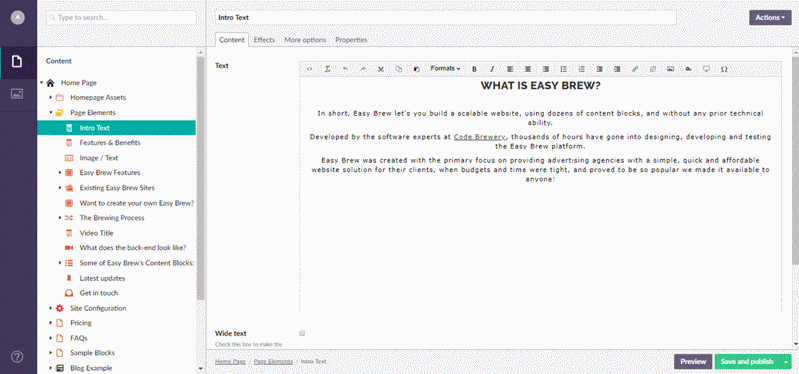
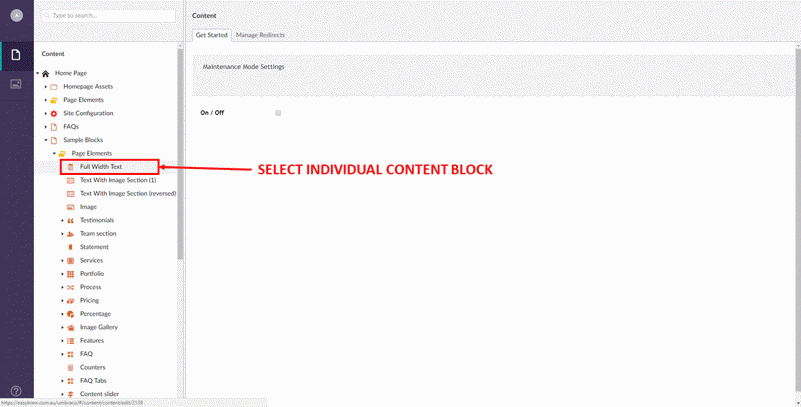
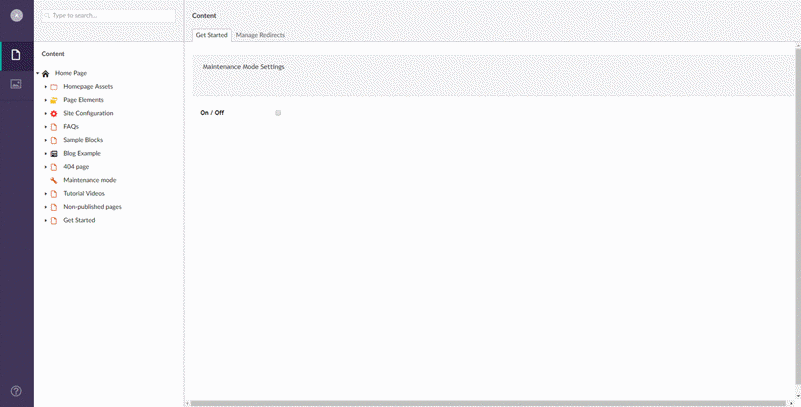
4. Expand “Home Page” and all the website’s individual pages are arranged down the left column of the CMS. To edit an individual content block within a page, click the collapsed node on the page name, then click the collapsed node on “Page Elements.” Finally click on the individual content block to edit it. Click “Save and publish” when done.
5. To edit anything within Easy Brew, be it a content block, a new page or the overall site’s settings, you will find features arranged into tabs in the right hand column, when you click on the item in the left hand column.
6. To create, delete, sort, move, copy or publish anything in Easy Brew, whether it be a new page or a new content block, you will need to click on the three dots (ellipsis) next to the father node. For example, if you wish to add a new page to the home page, click on the ellipsis next to “Home Page” then “Standard Content Page” If you wish to do anything else (such as delete, sort, move, copy or publish), click “Do Something Else.” You will need to do this on the appropriate node, so if you want to move an individual page, click on the ellipsis next to the name of the page you wish to action.
Important: To add new content blocks you will need to go to the “Page Elements” section that corresponds to that page, and click the ellipsis. If you wish to do anything else (such as delete, sort, move, copy or publish), click “Do Something Else.” You will need to do this on the appropriate node, so if you want to move an individual content block, click on the ellipsis next to the name of the content block you wish to action.

7. Many of the content blocks have been built in a way that allows you to grow them indefinitely. So in a similar way to how you add new pages to your site, you will need to add new items to the content block.
For example, if you wanted to add a new team member to the "Team Section" content block, click on the ellipsis next to “Team Section” in the left column, then click “Team Item”. Finally, populate the content tabs in the right column for each new item. You can do this as many times as you like to add new team member elements to this content block.

8. To update the site’s overall settings, such as: change the footer, update the theme, add items to the navigation menu or change the site’s logo; expand “Site Configuration” then click on “Global Settings.” All the settings are arranged into relevant tabs in the right column.
9. To change the hero image on the home page, expand “Home Page Assets” and then expand “Slider Images.” Here you will find the different slider images, to edit in the same manner as the rest of the site. For all the other pages, this is done in the options tab in the right column, for each page.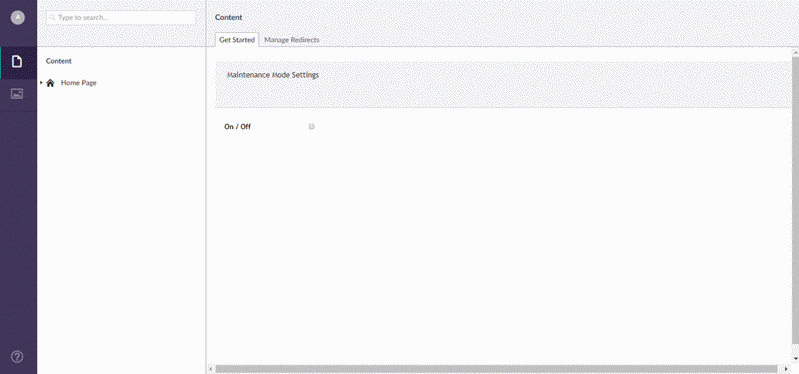
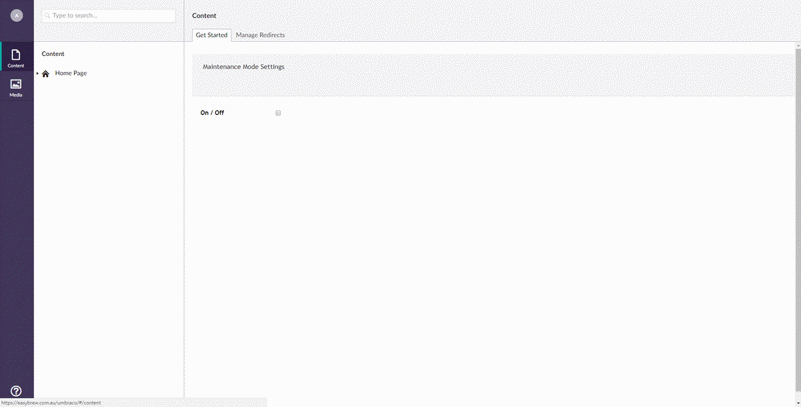
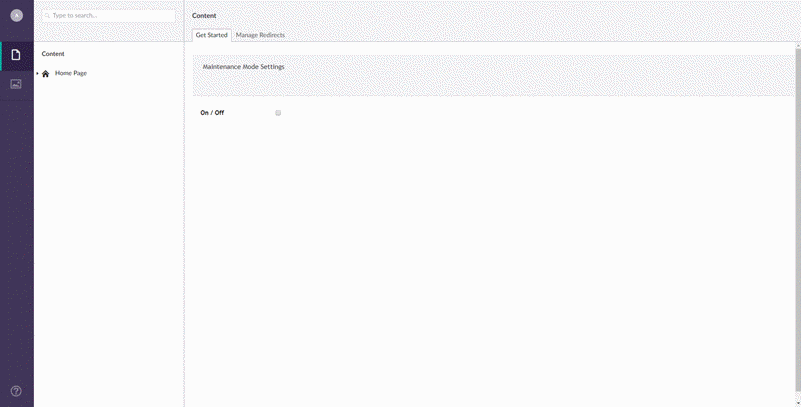
10. Finally, when your site is ready, take off maintenance mode by clicking on “Content” (above “Home Page” and not to be confused with the “Content” tab above “Media” in the extreme left column) and uncheck the box. This is also the first screen you see when logging into the CMS.